
How To Fix Squeaky Floors?
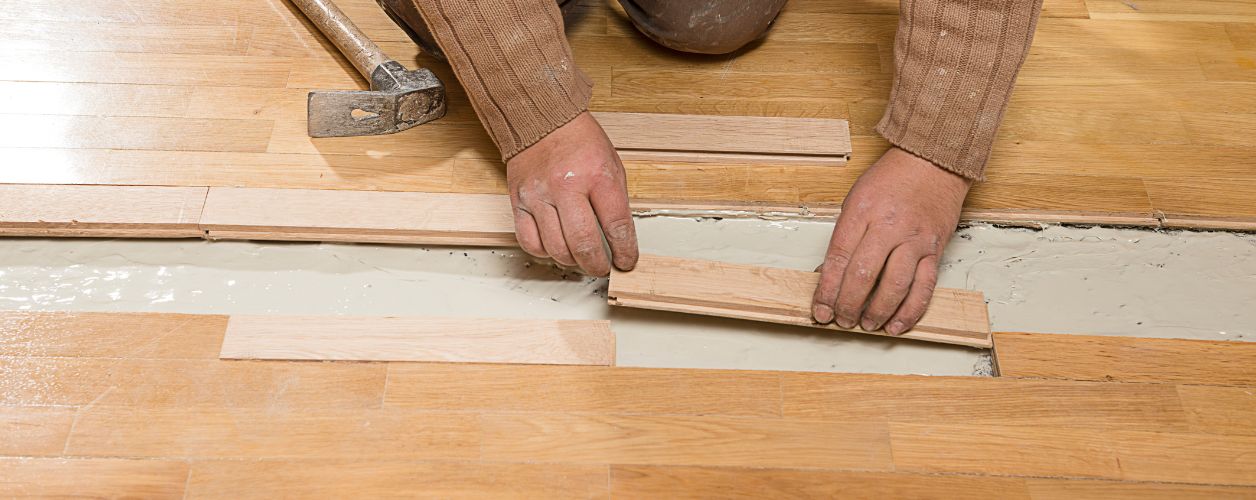
Table Of Contents
- Introduction
- Common Causes Of Squeaky Floors
- Identifying The Source Of The Squeak
- Fixing Squeaks From Above
- Fixing Squeaks From Below
- Materials And Tools For Squeaky Floor Repairs
- When To Call A Professional Flooring Expert
- Preventive Measures For Kiwi Homes
- Building Codes & Safety Considerations In NZ
- Conclusion
A squeaky floor can be a particularly annoying problem for homeowners in New Zealand. These are caused by loose floorboards or movement in the subfloor due to changes in humidity. Whether it's a classic Kiwi villa or a brand-new home, floor creaks can interrupt the peace and also serve as a warning of a potential structural problem. Thankfully, having squeaky floors fixed is something you can do yourself or else call in a tradesman for a short day. In this blog, we have covered the common causes for squeaky floors in New Zealand homes and provided solutions to stop the noise and bring back stability and comfort to the floor.
Common Causes Of Squeaky Floors
- Timber Shrinkage: Variable humidity levels in New Zealand bring about expansion and contraction of timber, which in turn leads to gaps and movements that cause squeaking noises.
- Loose Nails or Screws: In aging wooden homes, the nails or screws might lose their grip over time, allowing a bit of movement of the floorboards, which in turn rub against the fasteners.
- Friction Between Boards or Joists: When floorboards are sliding through movement or lesser grades of installation against each other or the joist beneath, they produce sound.
- Worn Flooring Materials: This occurs when the floor has passed its best days and all strength has waned due to wear and tear, allowing a lot of movement and noise.
- Subfloor Issues: Gaps or misalignment in the subfloor can also cause squeaks.
Identifying The Source Of The Squeak
- Locate: Find out if the squeak is issued from the top floorboards or from underneath.
- Test the walk: Walk slowly across the floor while listening and marking areas where the floor squeaks with tape or chalk.
- Weight test: Apply pressure alternately on the marked spots so as to isolate the actual source.
- Check underfloor access: Chances are, if your house is in New Zealand, especially if it is an old one, there are crawl spaces or underfloor basements you can use for inspection from beneath.
- Look out for gaps or movement: Check for loose nails, strange friction of boards, or separation of joists that could be playing tricks with your nervous system or provoking the noise toward your ear.
Fixing Squeaks From Above (Top-Down Repairs)
Using Wood Screws for Loose Floorboards
If floorboards move or rub against each other, they are to be secured with wood screws. Screws may be driven right through the floorboard, into the joists from below, effectively stopping any movement. A small countersink should be given to the screws, so as neither to cause tripping hazards nor be raised above the surface.
Application of Wood Adhesive
Small gaps or loose edges can be dealt with by injecting a strong wood adhesive into the seams to bond the boards together. Weigh down the boards tightly until the glue dries.
Applying Talcum Powder or Graphite Lubricant
Squeaks due to friction between floorboards can be eased by sprinkling talcum powder or powdered graphite, or by the choice of silicone-based lubricant into the gap, all spread about by repeatedly walking over the area to distribute the powder and to silence the squeaks.
Installing Trim Screws on Carpeted Floors
Where the squeaks occur beneath carpeted floors, locate the joist line and employ trim screws designed for this purpose. These screws go through the subfloor into the joists, securing any loose spots. Their heads snap off cleanly below carpet level, so the surface will remain undamaged.
Urgency to Exercise Caution While Repairing
Try to make sure that no plumbing or wiring is installed within the repair zone. It is, therefore, highly advisable to use a stud finder or consult floor plans before going on to drill into or screw the floorboards.
Fixing Squeaks From Below (Underfloor Access)
Shimming gaps between joists and floorboards:
In older New Zealand houses with timber floors, often gaps develop between the joists and the floorboards because a little shrinkage or movement of the wood has occurred. Use wood shims or tapered wedges coated with glue to gently fill these gaps to prevent vertical movement that causes squeaks.
Reinforcing joists with construction adhesive and screws:
Where boards or subfloor panels are loose, place a bead of construction adhesive along the top edge of the joists, then, using screws rather than nails, reattach the boards. Screws grip better and allow less movement over time. Thus, this approach is great in the battle against plywood subfloor squeaks.
Installation of bridging blocks for greater support:
Place timber bridging blocks or nogs between joists where squeaking occurs; this will provide lateral stability and lessen bounce or flexing of the floor. Blocks should be tight-fitted and screwed down to prevent any movement in the future.
Checking for loose metal hardware and replacing if necessary:
In some underfloor cavities, metal ties or brackets may lose their hold over time; tightening or replacement would put an end to metallic creaks, tightly securing the floor structure.
Accessing the floor from below is usually the most assured and long-lasting solution for silencing squeaks in timber homes of New Zealand.
Materials And Tools For Squeaky Floor Repairs
Timber floor repairs involve horizontal installation of timber like radiata pine and treated plywood, which are readily available in New Zealand.
Screws of galvanized or stainless varieties are much preferred for fixing in humid or coastal areas.
Adhesive construction would be used for additional long-lasting strength, for example, Selleys Liquid Nails.
Other essential tools include a cordless drill, shims, and a pry bar.
Trusted local companies like Mitre 10 and Bunnings Warehouse offer a huge array of products for floor repair, adhesives, and fasteners for conditions found all over NZ.
When To Call A Professional Flooring Expert
- Persistent squeaks in old villas or bungalows: These kinds of houses often have complex timber structures or hidden defects that warrant expert evaluation.
- Unsafe or compromised floor structure: When the joists sag or rot, or crack, it would be wise to call a licensed construction builder or flooring specialist.
- Anything that implies failed attempts at DIY fixes: If any home fix attempts haven't stopped the noise, a professional may have more permanent remedies.
- Limited access: Tight or enclosed subfloors may require specialist tools and techniques to access and repair.
- Planning renovations: When having new flooring installed, take the opportunity to address the squeaks properly.
Preventive Measures For Kiwi Homes
- Have a regular inspection of the floor, especially in places like Northland or the Bay of Plenty, where heavy moisture may cause the early signs of damage or creaking.
- Use dehumidifiers in a damp-prone indoor environment, such as Wellington or Auckland, to preserve a normal indoor humidity level with a view to preventing timber swelling or shrinkage.
- File for underfloor insulation to aid proper temperature levels and avoid excessive moisture build-up.
- Supply waterproof underlays for carpet or floating floor installations to prevent movements and associated noises.
- Ensure subfloor space ventilation to lessen condensation and save the wood structure.
- Attend to leaks or ingress timely to stave off long-term issues affecting the floor.
Building Codes & Safety Considerations In NZ
While building repair is being done for squeaky floors in New Zealand, any structural modifications- be it replacing joists or altering subflooring- should be handy with the NZ Building Code. Make sure to consult with a licensed building practitioner if the modifications have structural integrity implications.
For DIY repairs, safety prevails while working under the floors.
- At all times, the circuit breaker concerned with any electrical circuit close to it should be switched off.
- Wearing protective gear such as gloves, goggles, and a mask, and adhering to good ventilation are recommended.
- Use a good, sturdy ladder or support when crawling inside
- Keep tools in working order to avoid tripping hazards.
- Also, in an earthquake-prone zone, consider any existing structural defects before commencing structural repair work lest one accidentally worsen a hidden one.
Conclusion
Squeaky floors in New Zealand have to be fixed by identifying the source, then using the proper tools or repair techniques, depending on the floor access. Quick resolution is preferable, especially if the squeaking is a simple DIY fix or a structural concern, to keep the house quiet and safe. For sure, check with a local flooring expert for good measure.
YOU MIGHT ALSO BE INTERESTED IN
Capital Cities
- Flooring Contractors Services in Whangarei
- Flooring Contractors Services in Auckland Central
- Flooring Contractors Services in Hamilton
- Flooring Contractors Services in Whakatane
- Flooring Contractors Services in Gisborne
- Flooring Contractors Services in Napier Terrace
- Flooring Contractors Services in Stratford
- Flooring Contractors Services in Palmerston North
- Flooring Contractors Services in Wellington Central
- Flooring Contractors Services in Richmond
- Flooring Contractors Services in Nelson East
- Flooring Contractors Services in Blenheim Central
- Flooring Contractors Services in Greymouth
- Flooring Contractors Services in Christchurch
- Flooring Contractors Services in Dunedin Central
- Flooring Contractors Services in Invercargill
- Flooring Contractors Services in Waitangi